FAQs
Facebook Business Manager Frequently Asked Questions
A Facebook Business Manager is a tool Facebook has set up that allows you to access your Facebook page, Ad Account, Pixel, and much more from one central location. From your Facebook Business Manager, you can also give access to different team members, or in this case, Repair Lift. An important note: a Facebook Business Manager is NOT the same thing as a Facebook Business Suite.
Giving Repair Lift access to your Facebook Business Manager allows us to give our teams access to the various accounts they need to monitor and/or post to. Trying to add Repair Lift to your Facebook Page or Business Suite will
1. Not be possible due to how Facebook is set up and
2. Will not provide us with the access we require.
For more specific information about Facebook Business Managers, click here.
Unfortunately, no. Due to some of the information Facebook will ask about your business during the setup process, Repair Lift cannot set up the account for you.
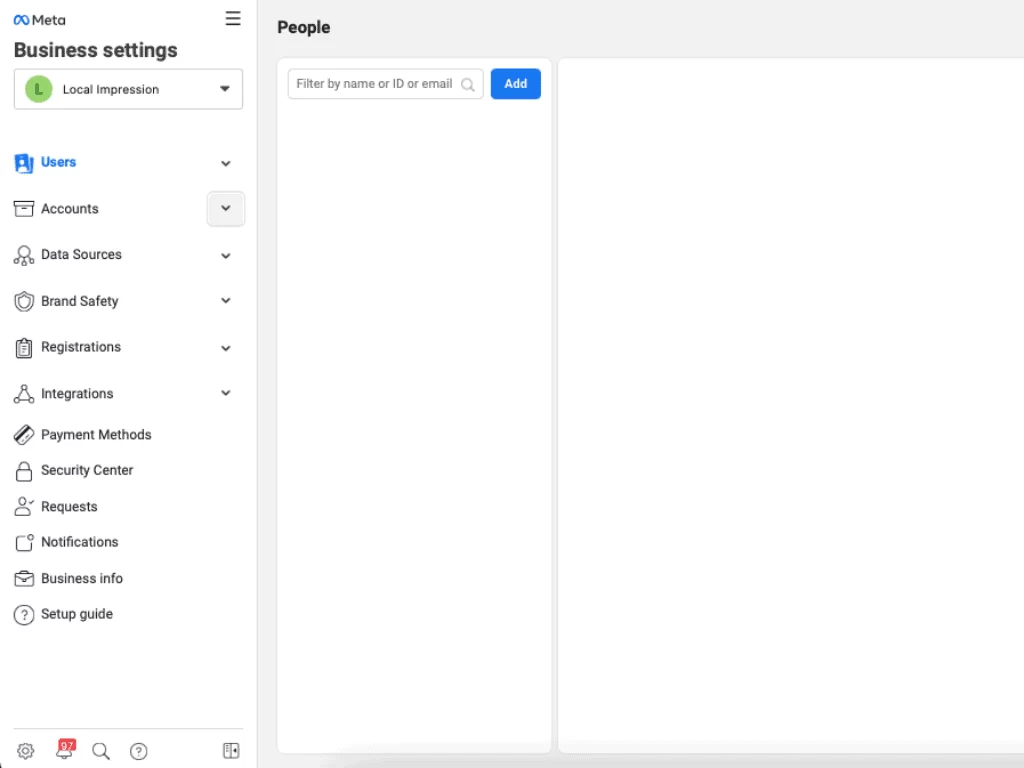
1. Search business.facebook.com/settings
2. If you are taken to a page that has “Meta Business Suite” in the top left, you are in the wrong place. If you are taken to a page similar to the one pictured below, you have a Business Manager! You can continue to the next step of giving Repair Lift access.
You will need a personal Facebook profile.
1. Visit https://business.facebook.com/overview.
2. In the top right corner, click “Create Account”.
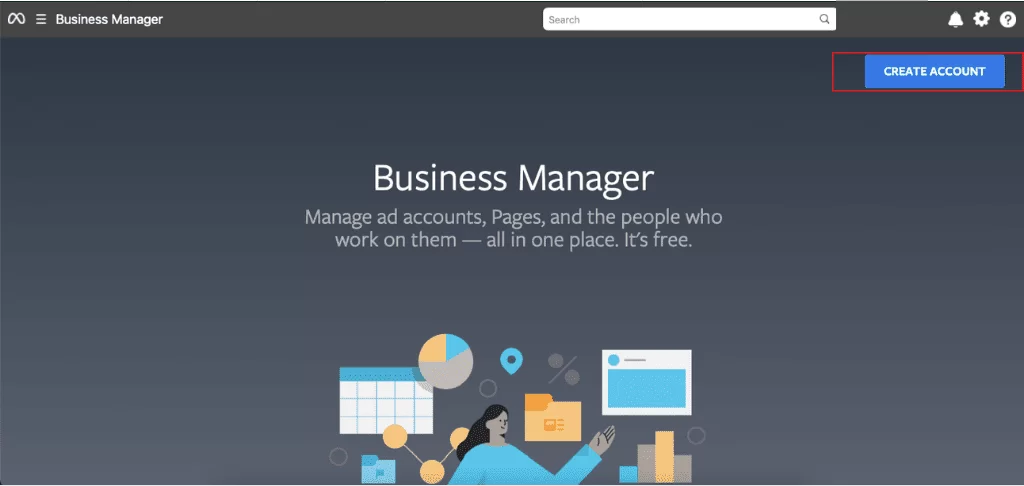
3. Follow the prompts Facebook gives you to set up the account.
Visit business.facebook.com/settings.
Navigate to the “People” section and click the blue “Add” button.
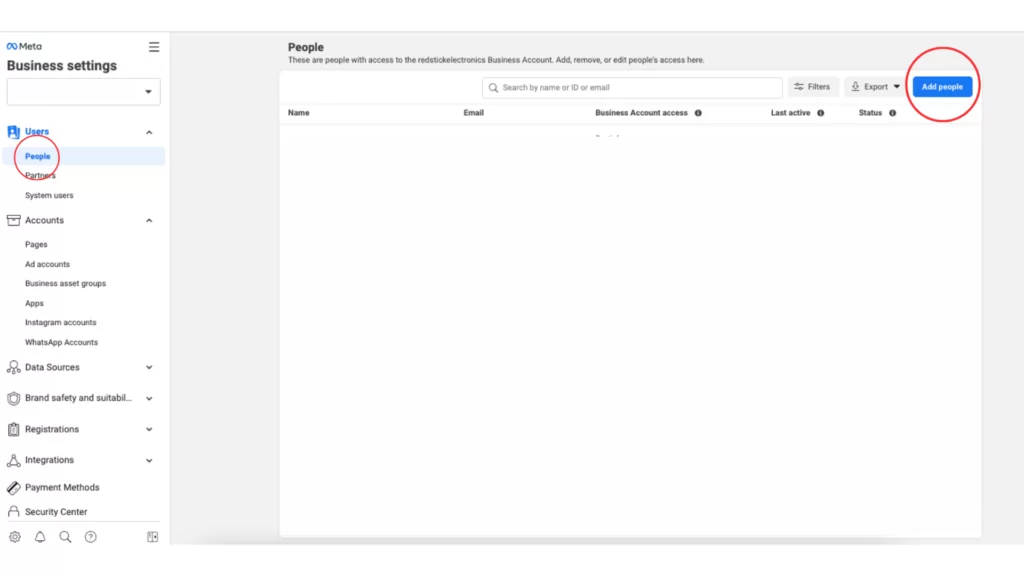
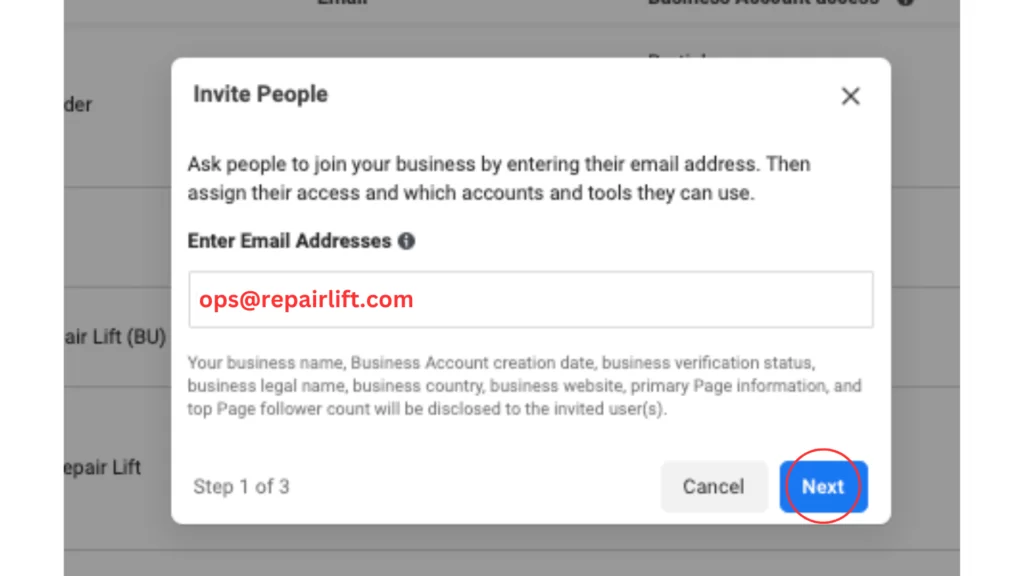
When you click the blue “Add” button, a pop up will appear. In that pop up, enter “ops@repairlift.com”, click the “Next” button.
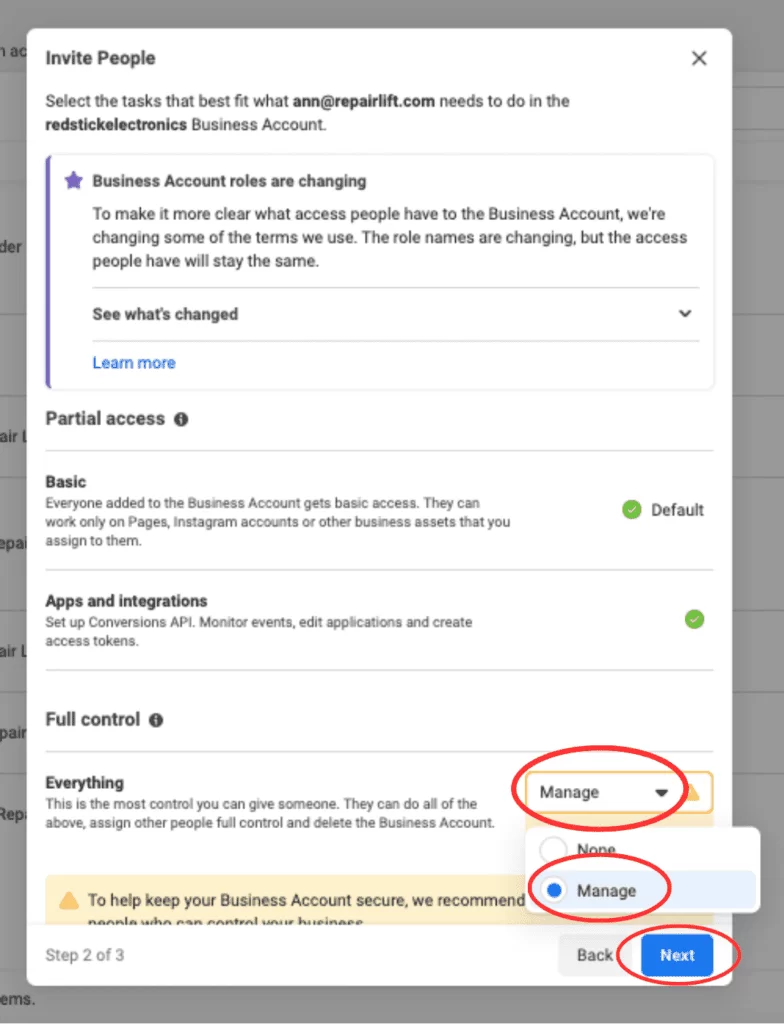
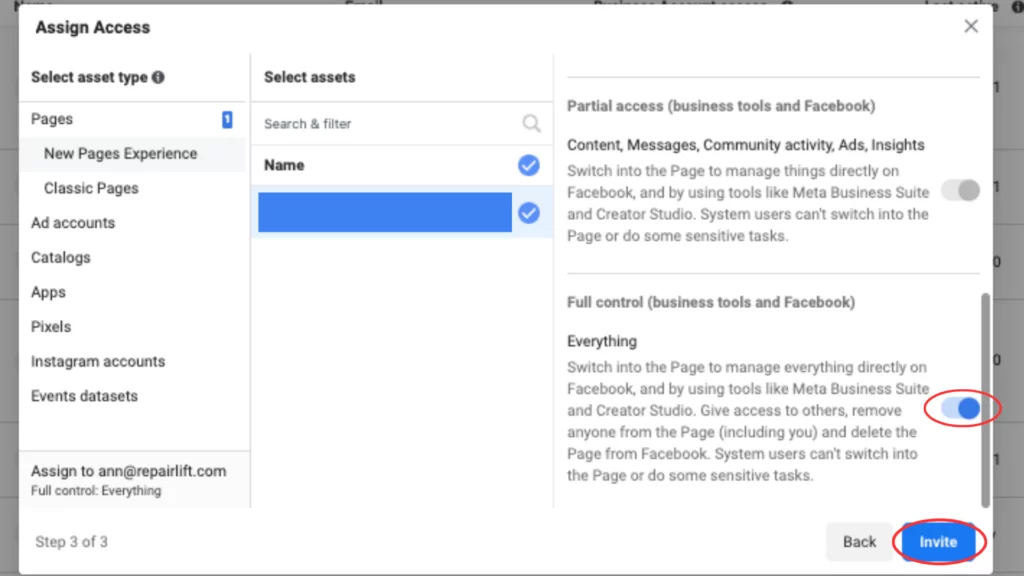
You will then be prompted to set the access level. Please choose “Full Control” > “Manage” > and select Manage. Then push “Next.
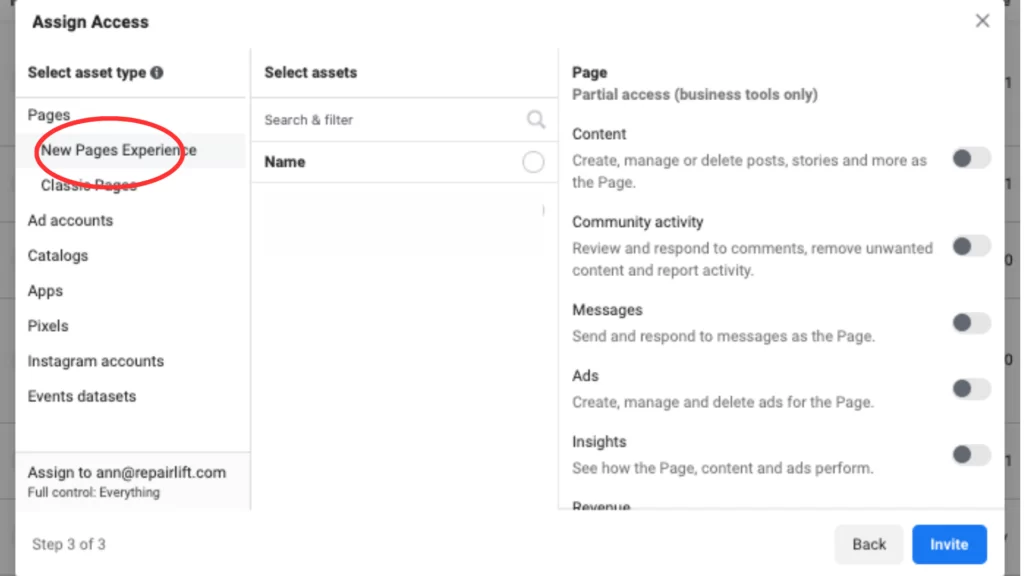
Check under “New Page Experience” and “Classic Page” and find where your FB page is listed.
Select your page and toggle on the “Revenue” line.
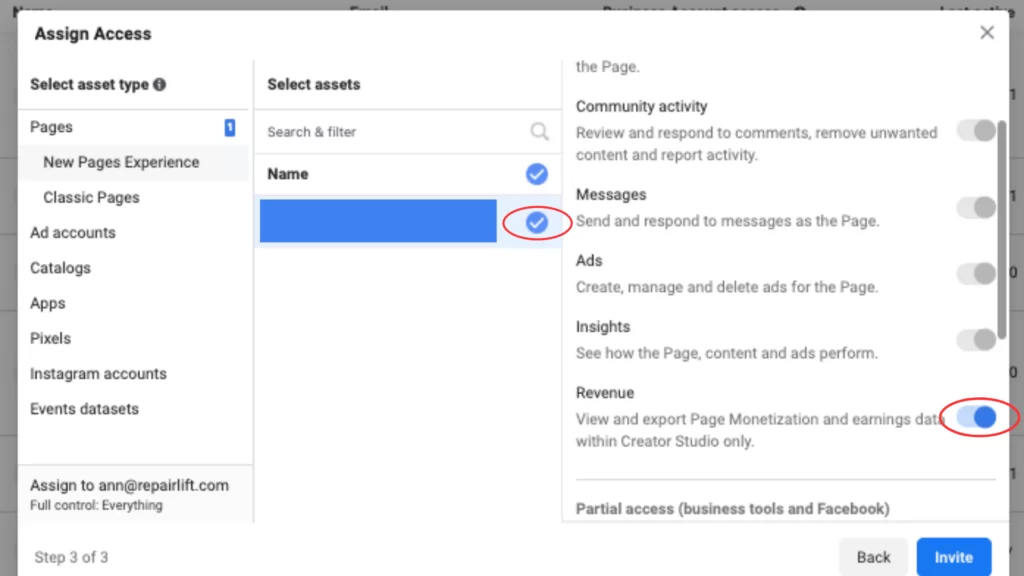
Scroll all the way down and toggle on “Everything” under “Full Control,” then click “Invite”
5. Now you need to make sure you have a payment method connected to your account.
1. On the left hand side of your Facebook Business Manager, scroll down and click the “Payment Method” section.
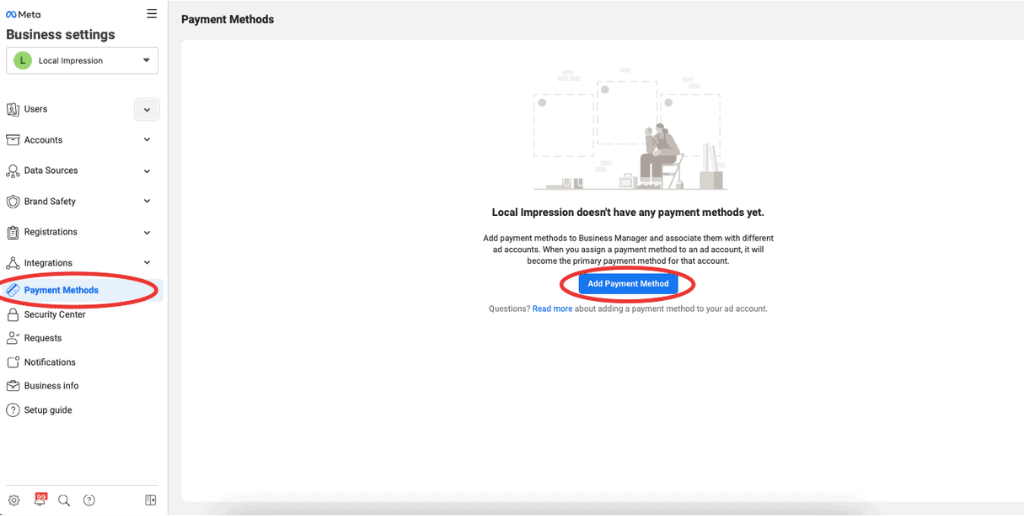
2. Click “Add Payment Method” and enter your card information.
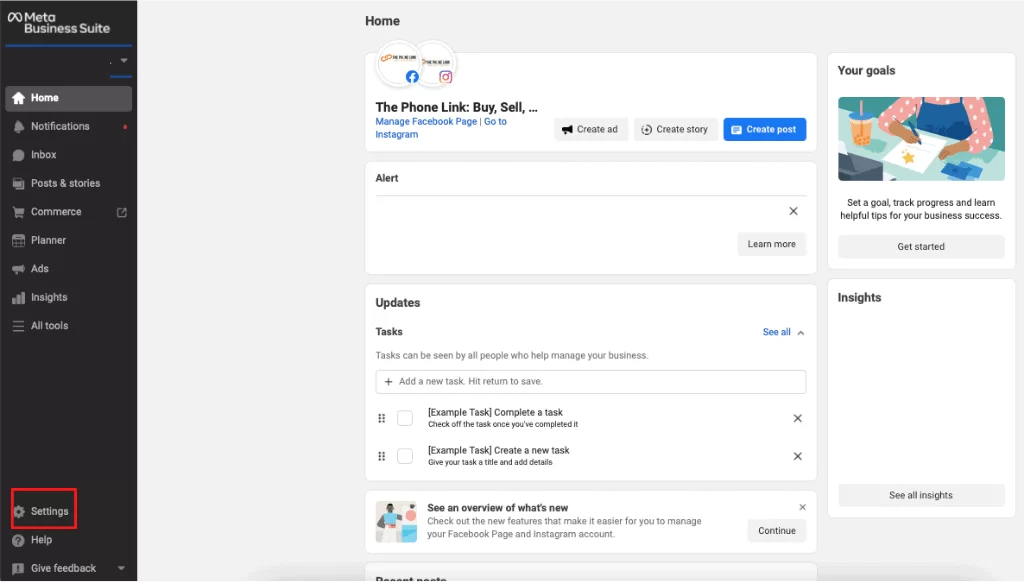
1. Visit your Business Suite.
2. On the left side you will see a dark gray menu, click the “Settings” icon at the bottom
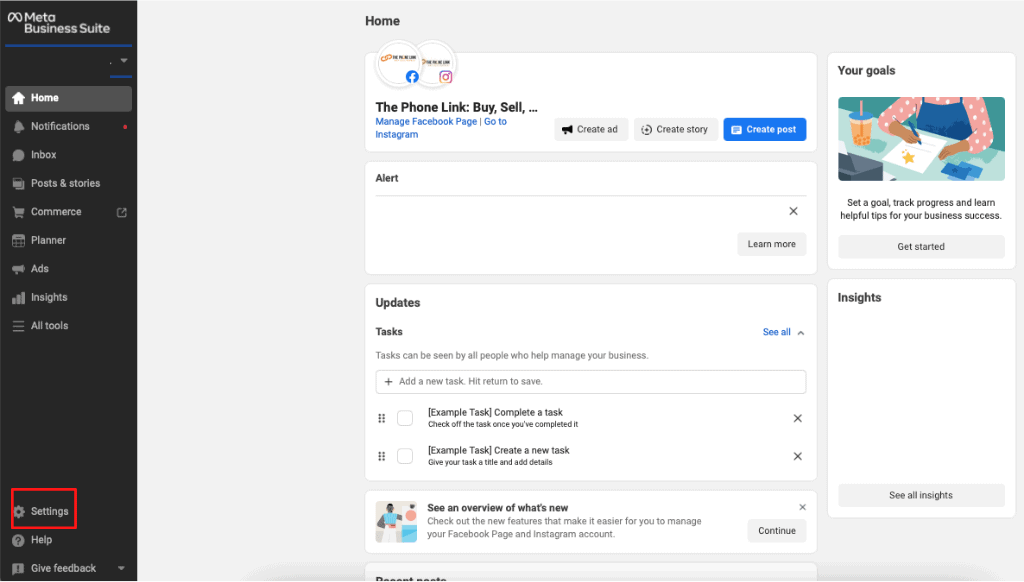
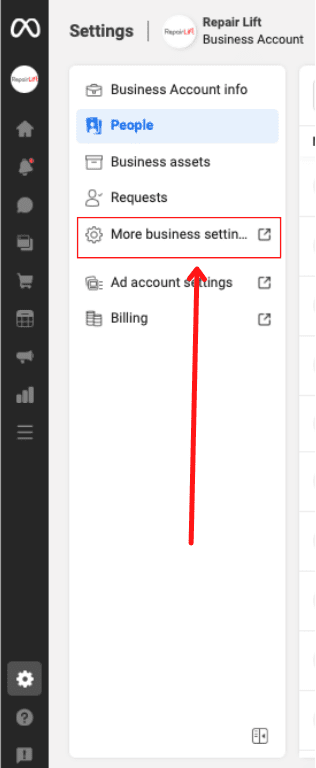
3. You will either have a new window open, or a side menu appear. Look for the “Business Settings” or “More Business Settings” option. Whichever one appears, click it and you will be taken to the Facebook Business Manager where you can add our team!
1. Can I just add Repair Lift as an Admin to the Facebook Page?
a. No. Due to how Facebook is set up you will not be able to. Adding Repair Lift to the page will NOT provide us with the access we need.
2. Can I give Repair Lift my Facebook login credentials and let Repair Lift add the page?
a. No. Facebook’s security settings will make this a much more time consuming process that may, in the end, not work.
3. If I’m not the Admin on the Facebook Page, what do I do?
a. Contact the designated Admin(s) listed in the “Page Roles” section of your Facebook Page Settings and ask them to add you as an Admin.
b. If someone no longer connected to your business is the sole Admin on your account, contact Facebook Support.
c. If you do not know who the Admin is, contact Facebook Support.
1. Confirm you personally are an Admin on your Facebook Page and Facebook Business Manager.
2. On the left hand side of your Facebook Business Manager, click the “Account” section and click “Pages”.

3. Click the blue “Add” button.
4. Select “Add a Page”.
5. Type in the name of your Facebook Page, select the correct option when it appears, and click “Add Page”.
6. Once you have completed this, you are finished.
There may be a few reasons why you cannot add your Facebook page:
1. You have an Instagram account connected to your Facebook Page. You can add both accounts at the same time as long as you have the Instagram account login. If you do not, go to your Facebook Page, Settings, Instagram, and disconnect the account. You can always reconnect the accounts when you are able to find the Instagram login.
2. You are not the Admin on either the Facebook Business Manager or the Facebook Page. Make sure you are an Admin on both and then you will be able to add the page.
Facebook may restrict your account for a variety of reasons, but requesting a review of your account will, in most cases, result in Facebook removing the restriction on your account. There are a few items to address in order to request a review of your account:
1. Make sure that your personal Facebook profile (the one you use to access your Facebook Business Manager) has 2 factor authentication turned on. To confirm this, visit your personal Facebook profile. Navigate to the “Settings & Privacy” section, click “Settings”, click “Security and Login”, and scroll down to “Two-factor authentication”. If it’s marked “On”, then you are all set. If it is marked “off”, go through the process of turning it on.
2. Ensure that all your business information is correct in your Facebook Business Manager.
a. Visit your Facebook Business Manager.
b. On the left hand side, scroll down and click “Business Information”.
c. Make sure all your business information is correct (address, name, website, phone number, etc).
3. Verify your account.
a. In your Facebook Business Manager, scroll down and click the “Security Center” section.

b. If your business account is not verified, click “Start Verification” and follow the prompts Facebook gives you.
c. Once you’ve completed this process, you will have to wait 1-3 days for the verification to finish. Set a reminder for yourself to come back and check if your account was verified.
4. Request a review.
a. In your Facebook Business Manager, scroll down and click the “Ad Account” section and click “See details”.
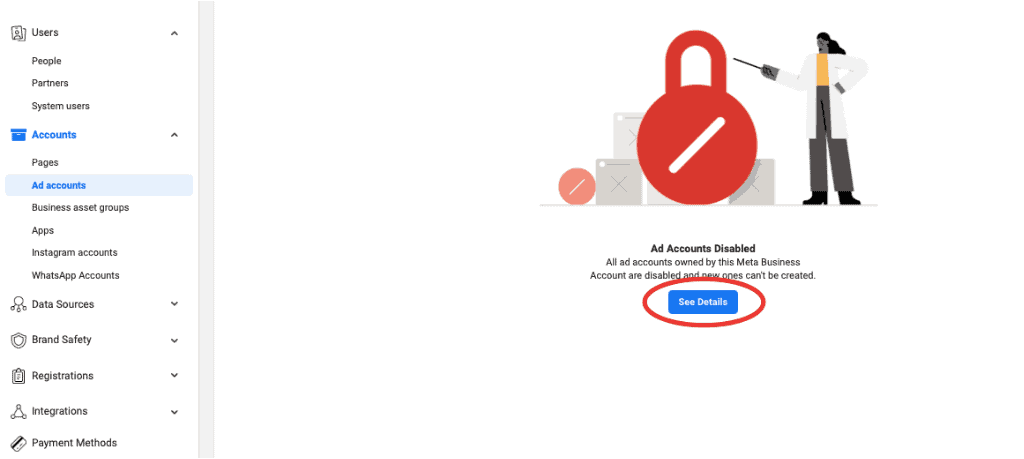
a. In your Facebook Business Manager, scroll down and click the “Ad Account” section and click “See details”.
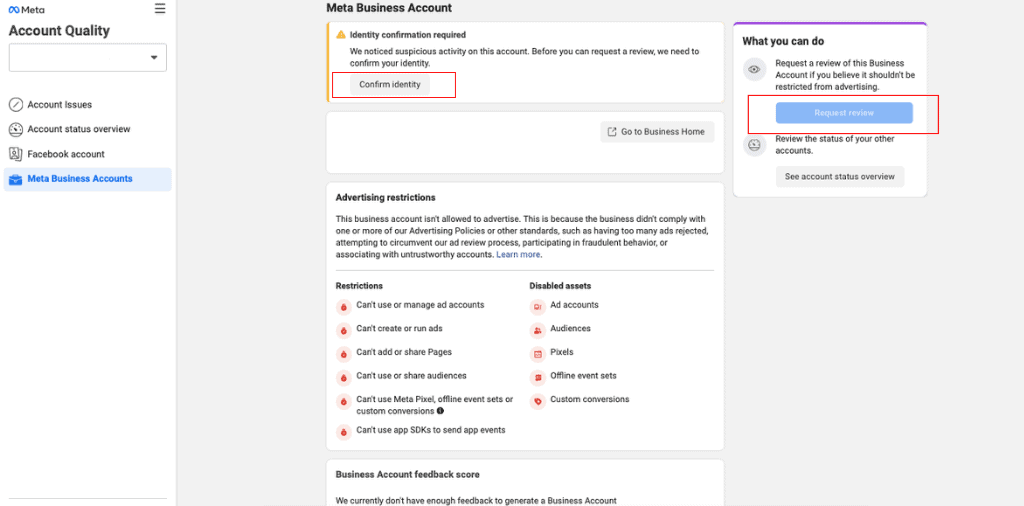
b. You may be asked to confirm your identity before you request a review. If so, please click “Confirm Identity” and follow the instructions.
c. Once that is complete, click “Request review. You may have to wait a few hours after confirming your identity before you can request a review. Set a reminder and come back to this step if necessary.
5. Generally, once you’ve completed the above steps and Facebook has reviewed your account, the restriction will be lifted. If the restriction has not been lifted, please let Repair Lift know.
Note: If your account has been restricted for several months, the verification and review process could take several days and may not go through. If this happens, you will need to contact Facebook Support.
1. Go to business.facebook.com/settings
2. You will see three bars in the top left area, click them
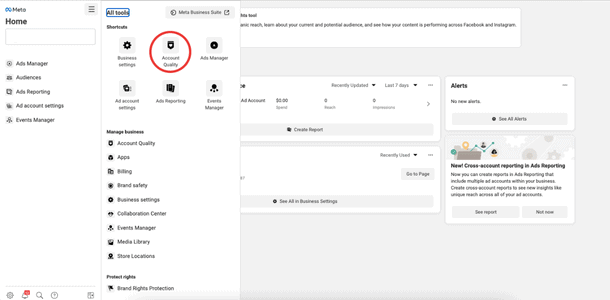
3. You will see an option for “Account Quality”, click that button. You will be redirected to an Account Quality page. On that page you will see a list of all your FB assets (Ad account, FB page, etc). There is a status next to each item, scroll till you find the item(s) that have a “restricted” status.
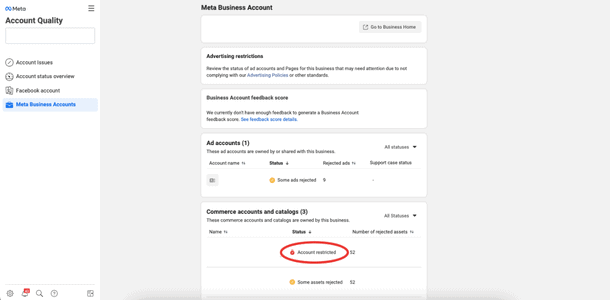
4. Click on the item and you will be redirected to a page where you can request a review of the item
NOTE: you may need to verify your identity. If that’s the case, you will need to submit a valid form of identification and wait for Facebook to approve it. This can take up to 24 hours.
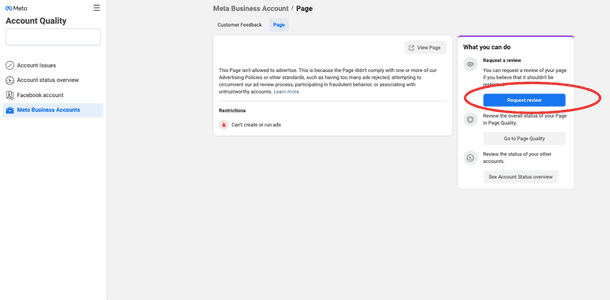
5. When you request a review, FB may ask you why you’re appealing the restriction. Select “I don’t know what policy was violated”
6. Once you’ve completed the review request, you will simply need to wait for FB to review your account. This can take a few hours up to 4 weeks. But the sooner you request a review, Facebook will (generally) review and make a decision on your account quickly.